Sitecore Content Hub Taxonomy Management: Power Tips for Efficient Taxonomy Control
by
Petar Mitev
Table of Contents
A practical guide on how to manage taxonomies more efficiently in Sitecore Content Hub.
Efficient management of taxonomies in Sitecore Content Hub can significantly streamline content processes and reduce implementation timelines, yet you can find yourself bogged down by manual and time-consuming tasks. If you’re implementing or maintaining taxonomy structures, especially on a large scale, you might be facing the difficult task of editing or deleting countless taxonomy values one by one. This article aims to provide you with practical solutions to enhance your taxonomy management, saving time and reducing errors.
Challenges in Taxonomy Management
In the current setup of the default Taxonomy admin page in Sitecore Content Hub, administrators must tackle taxonomy values individually. This not only leads to increased effort and potential for error but also consumes valuable time that could be better spent on strategic activities. Furthermore, the lack of editing or deleting in bulk capabilities complicates the process of maintaining an organized and up-to-date taxonomy system, particularly for large enterprises with extensive content ecosystems. In the example below, consider a large list of taxonomy values, which could even be several levels of values nested inside the taxonomy hierarchy:
Educational subjects taxonomy example
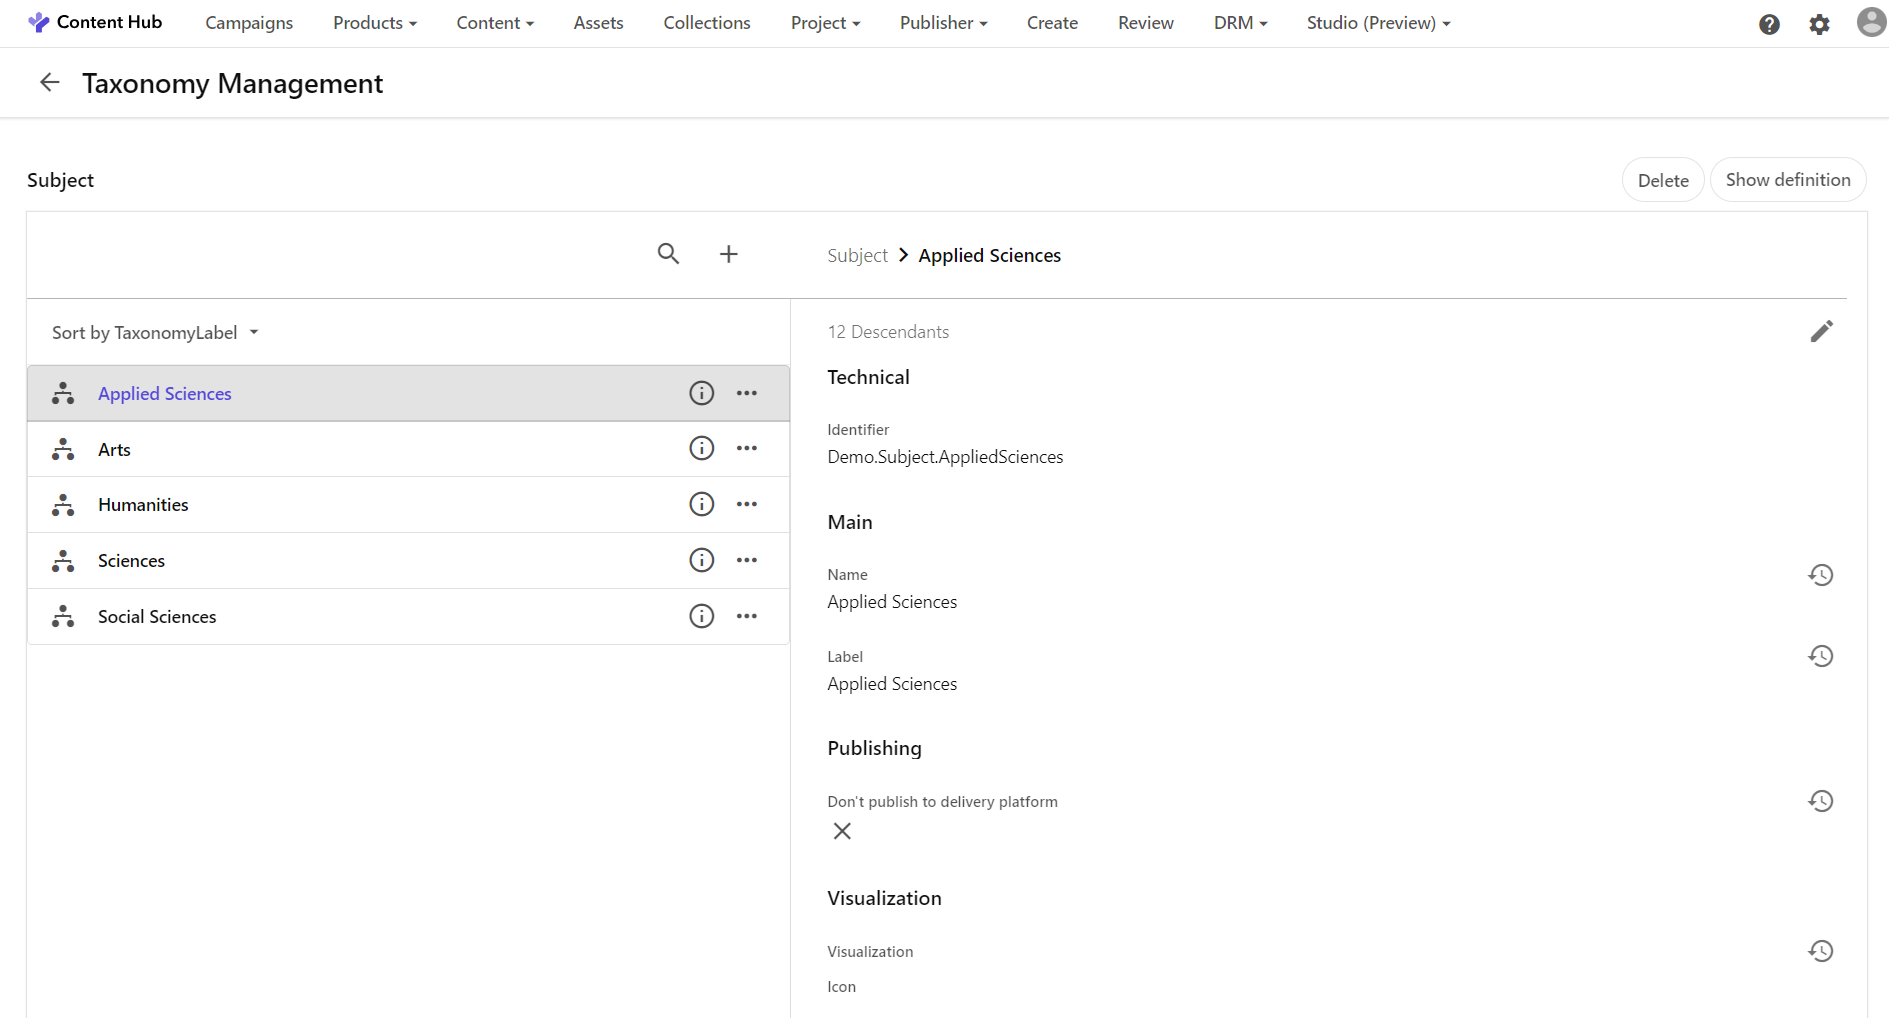
And once you’ve imported this taxonomy in Content Hub, the taxonomy will look like this at the root level:
Subject taxonomy in Content Hub
The Solution: Building a Hidden Taxonomy Management Page
To address these challenges, Content Hub gives you the flexibility and building blocks to implement a hidden taxonomy management portal page where you can configure your bulk selection actions according to your specific needs. This solution offers a centralized interface for taxonomy administrators to efficiently manage taxonomy values in bulk. By leveraging such a portal, tasks that previously took hours can be completed in minutes, thereby enhancing productivity and enabling administrators to focus on more critical aspects of content management. In the next section I will explain step-by-step how to build it in your Content Hub solution.
Step-by-Step Guide to Implementing the Portal Page
1. Prerequisites: Ensure that you have Superuser access to your Content Hub environment.
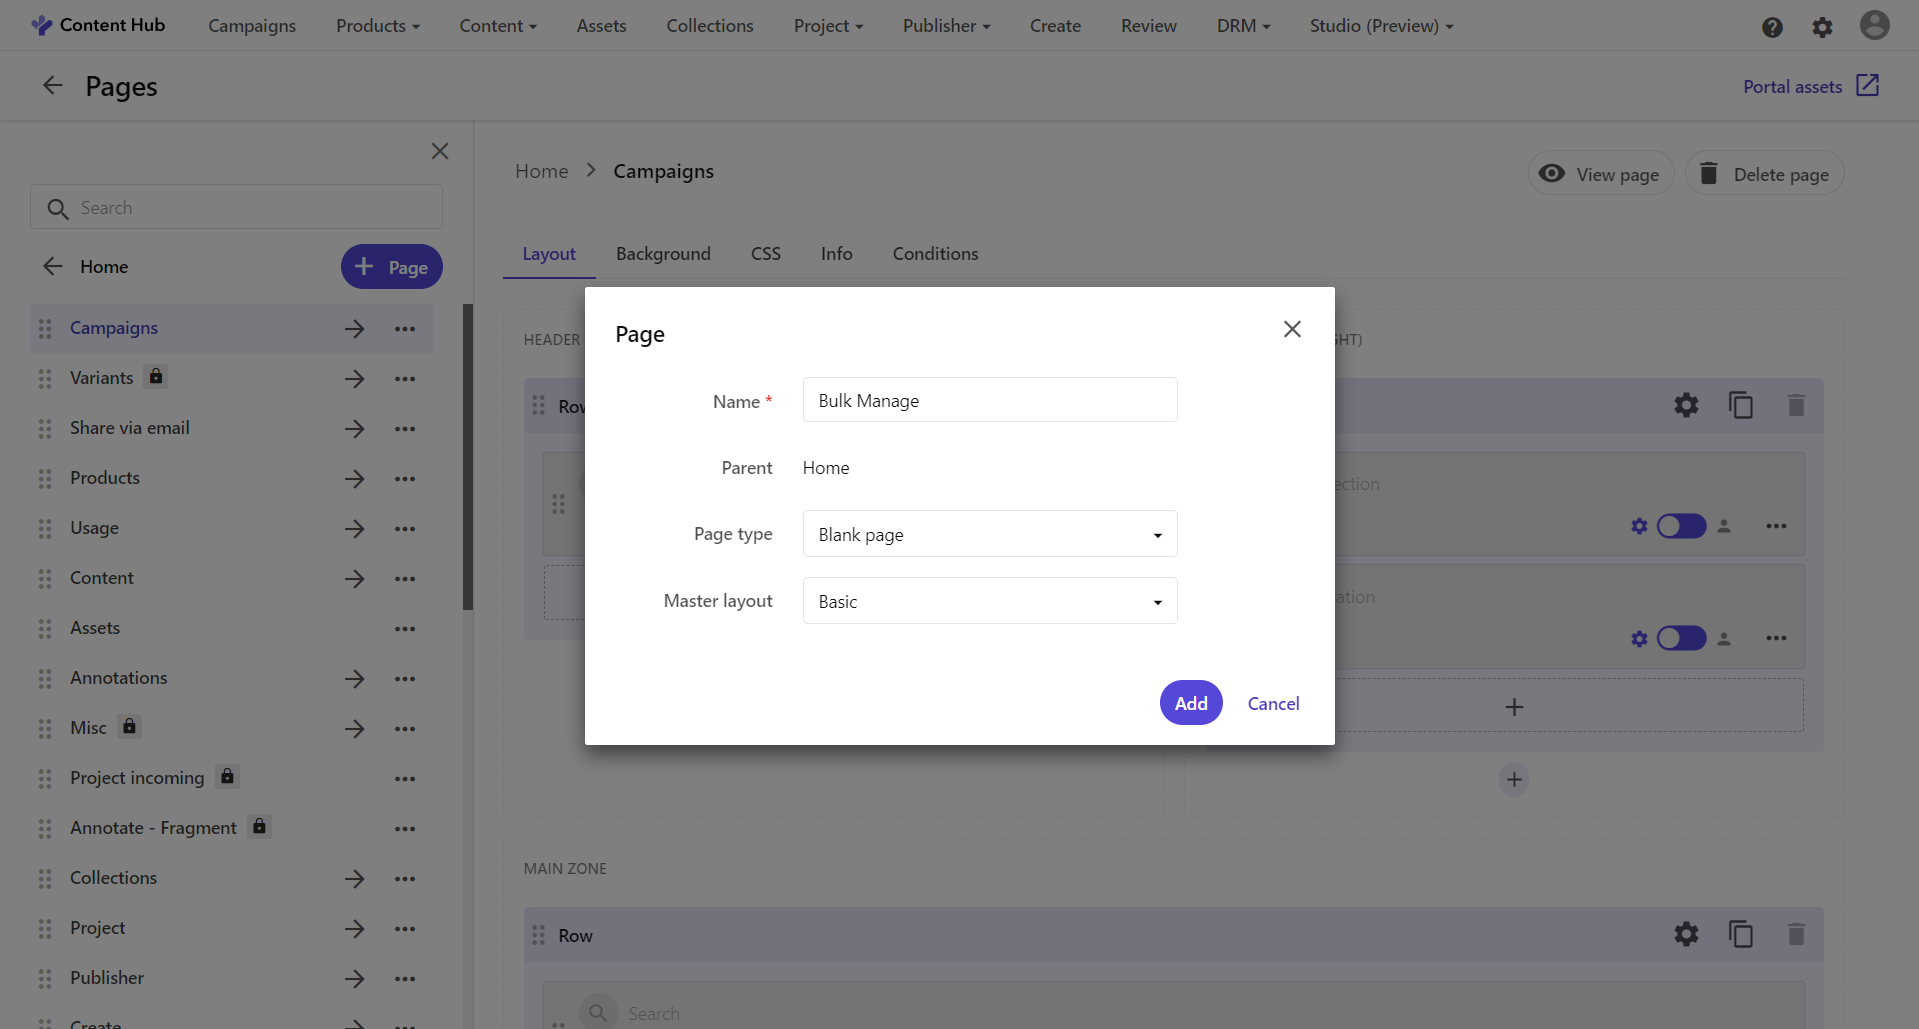
2. Creating the Portal Page: Navigate to Manage / Pages and create a new Page of type “Blank” and Master layout “Basic”.
Let’s give it the name “Bulk Manage” page. And you don’t have to worry about other users having permissions to it, if you haven’t explicitly given permissions to this page in your User Group policies only Superusers will have access to this page:
3. Creating the Search component: Next you need to create and configure the Search component that will display the taxonomy values that you want to be managing in bulk from this page.
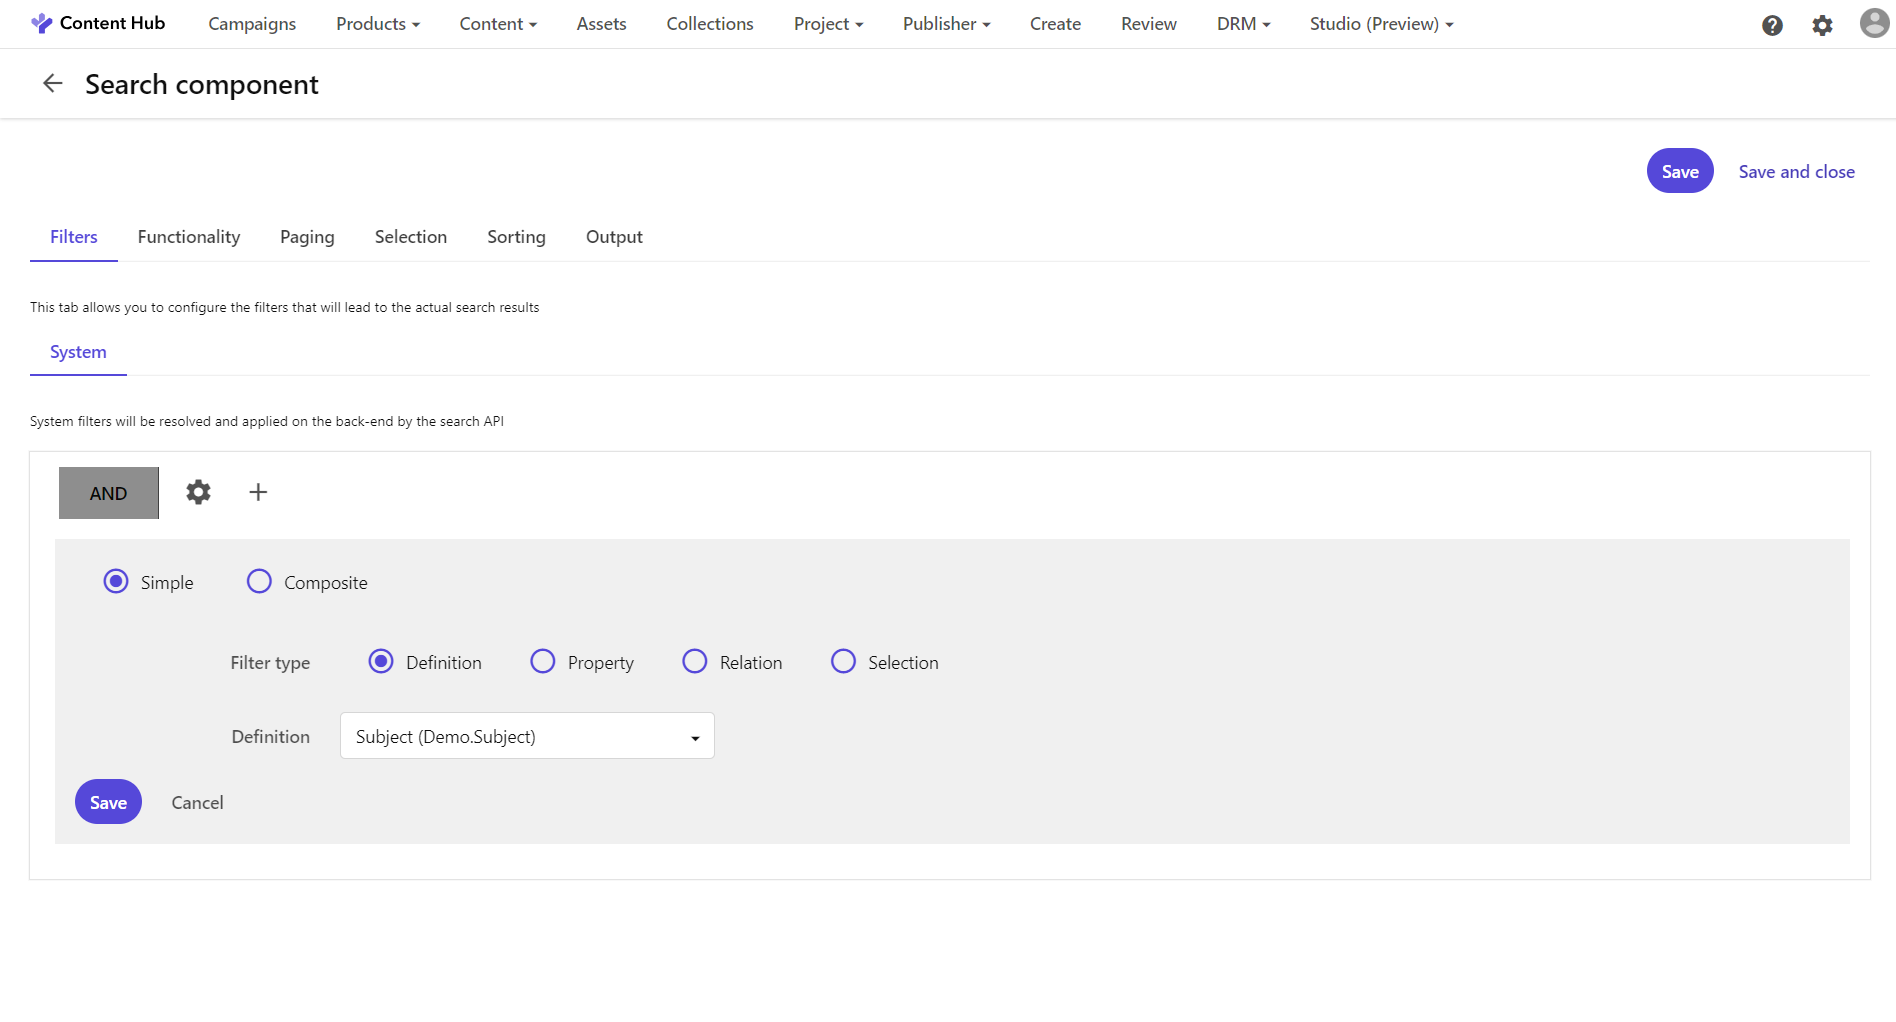
First, filter by the definition, in my case I will use the Demo.Subject taxonomy definition:
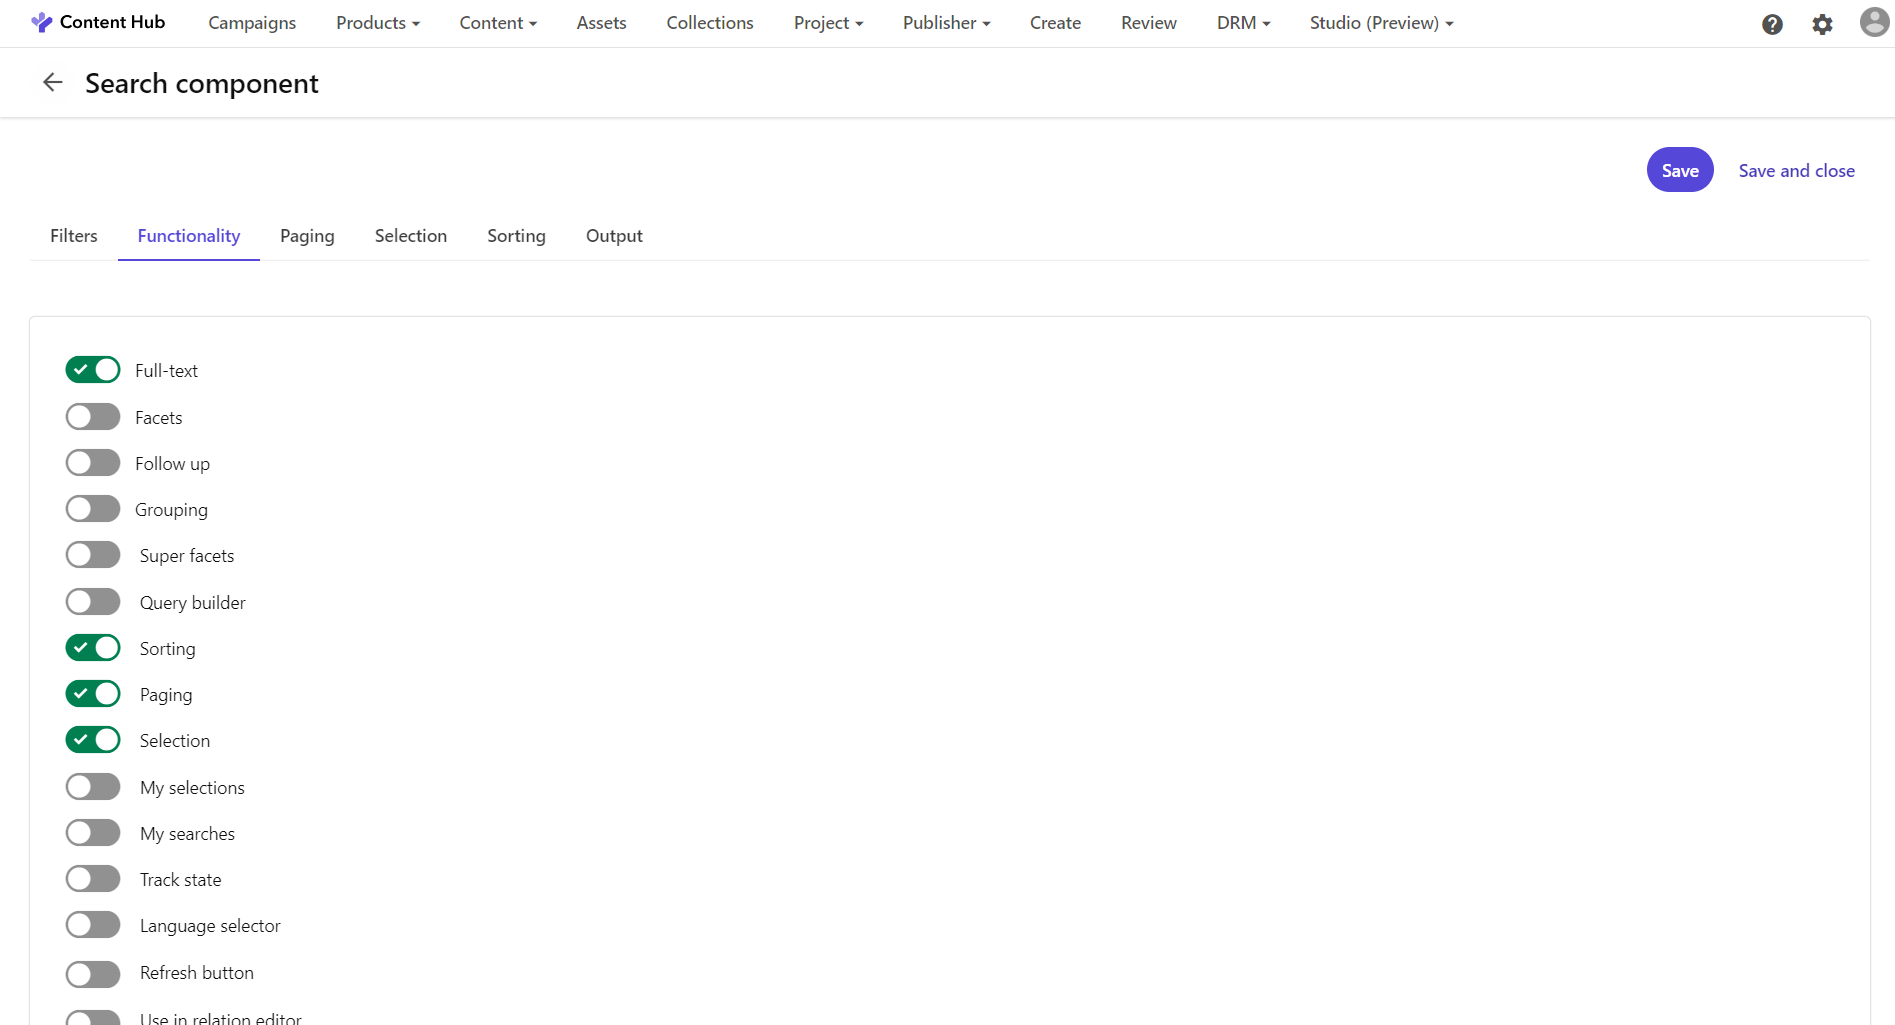
Then enable the functionality Full-text, Sorting, Paging and Selection:
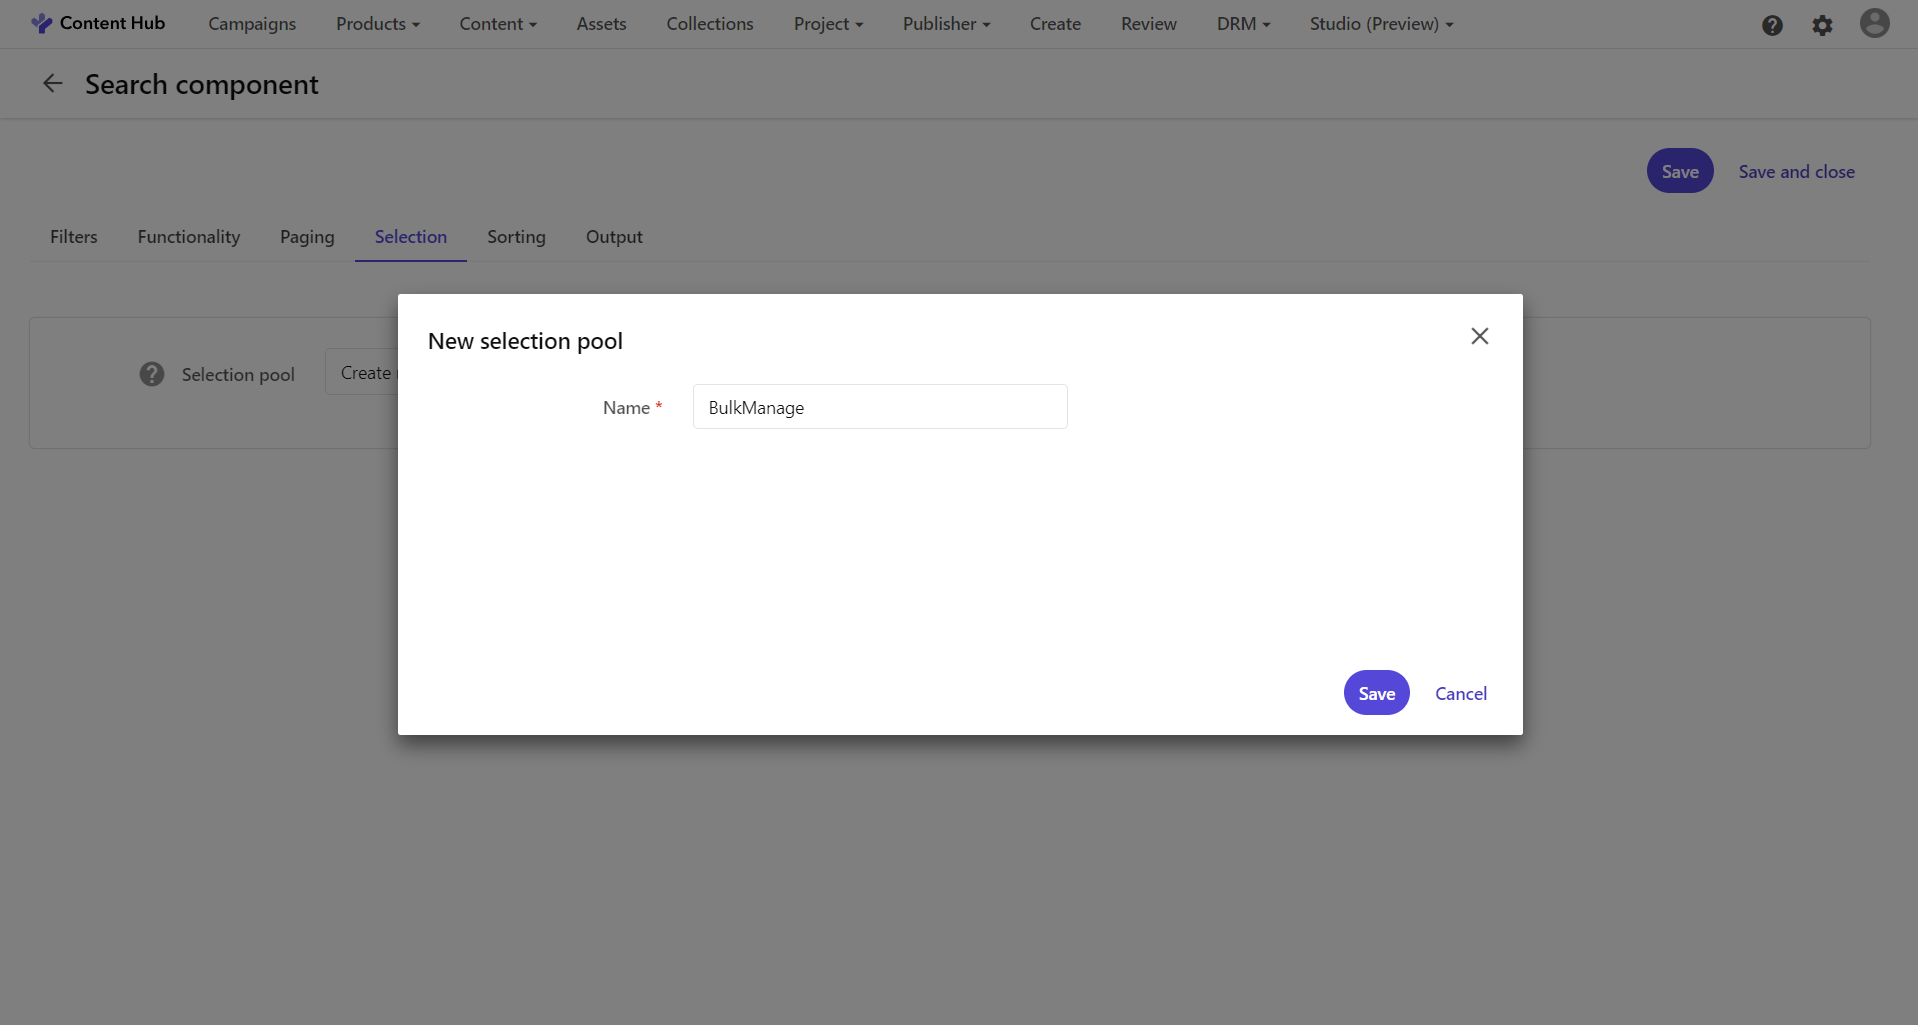
Next, you should configure a Selection pool, let’s create a new selection pool called BulkManage. You will be using this Selection pool in your Selection component in the following steps:
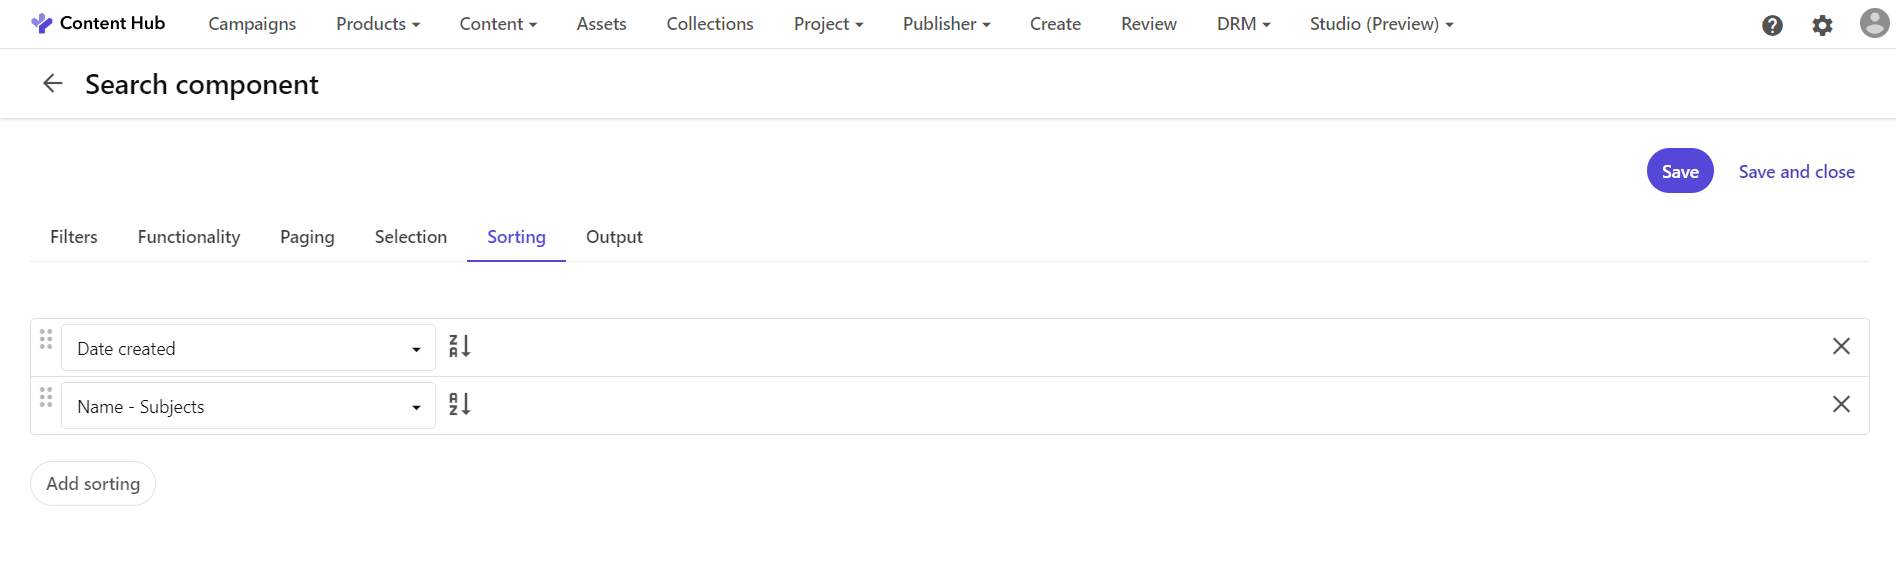
You can now add your sorting options:
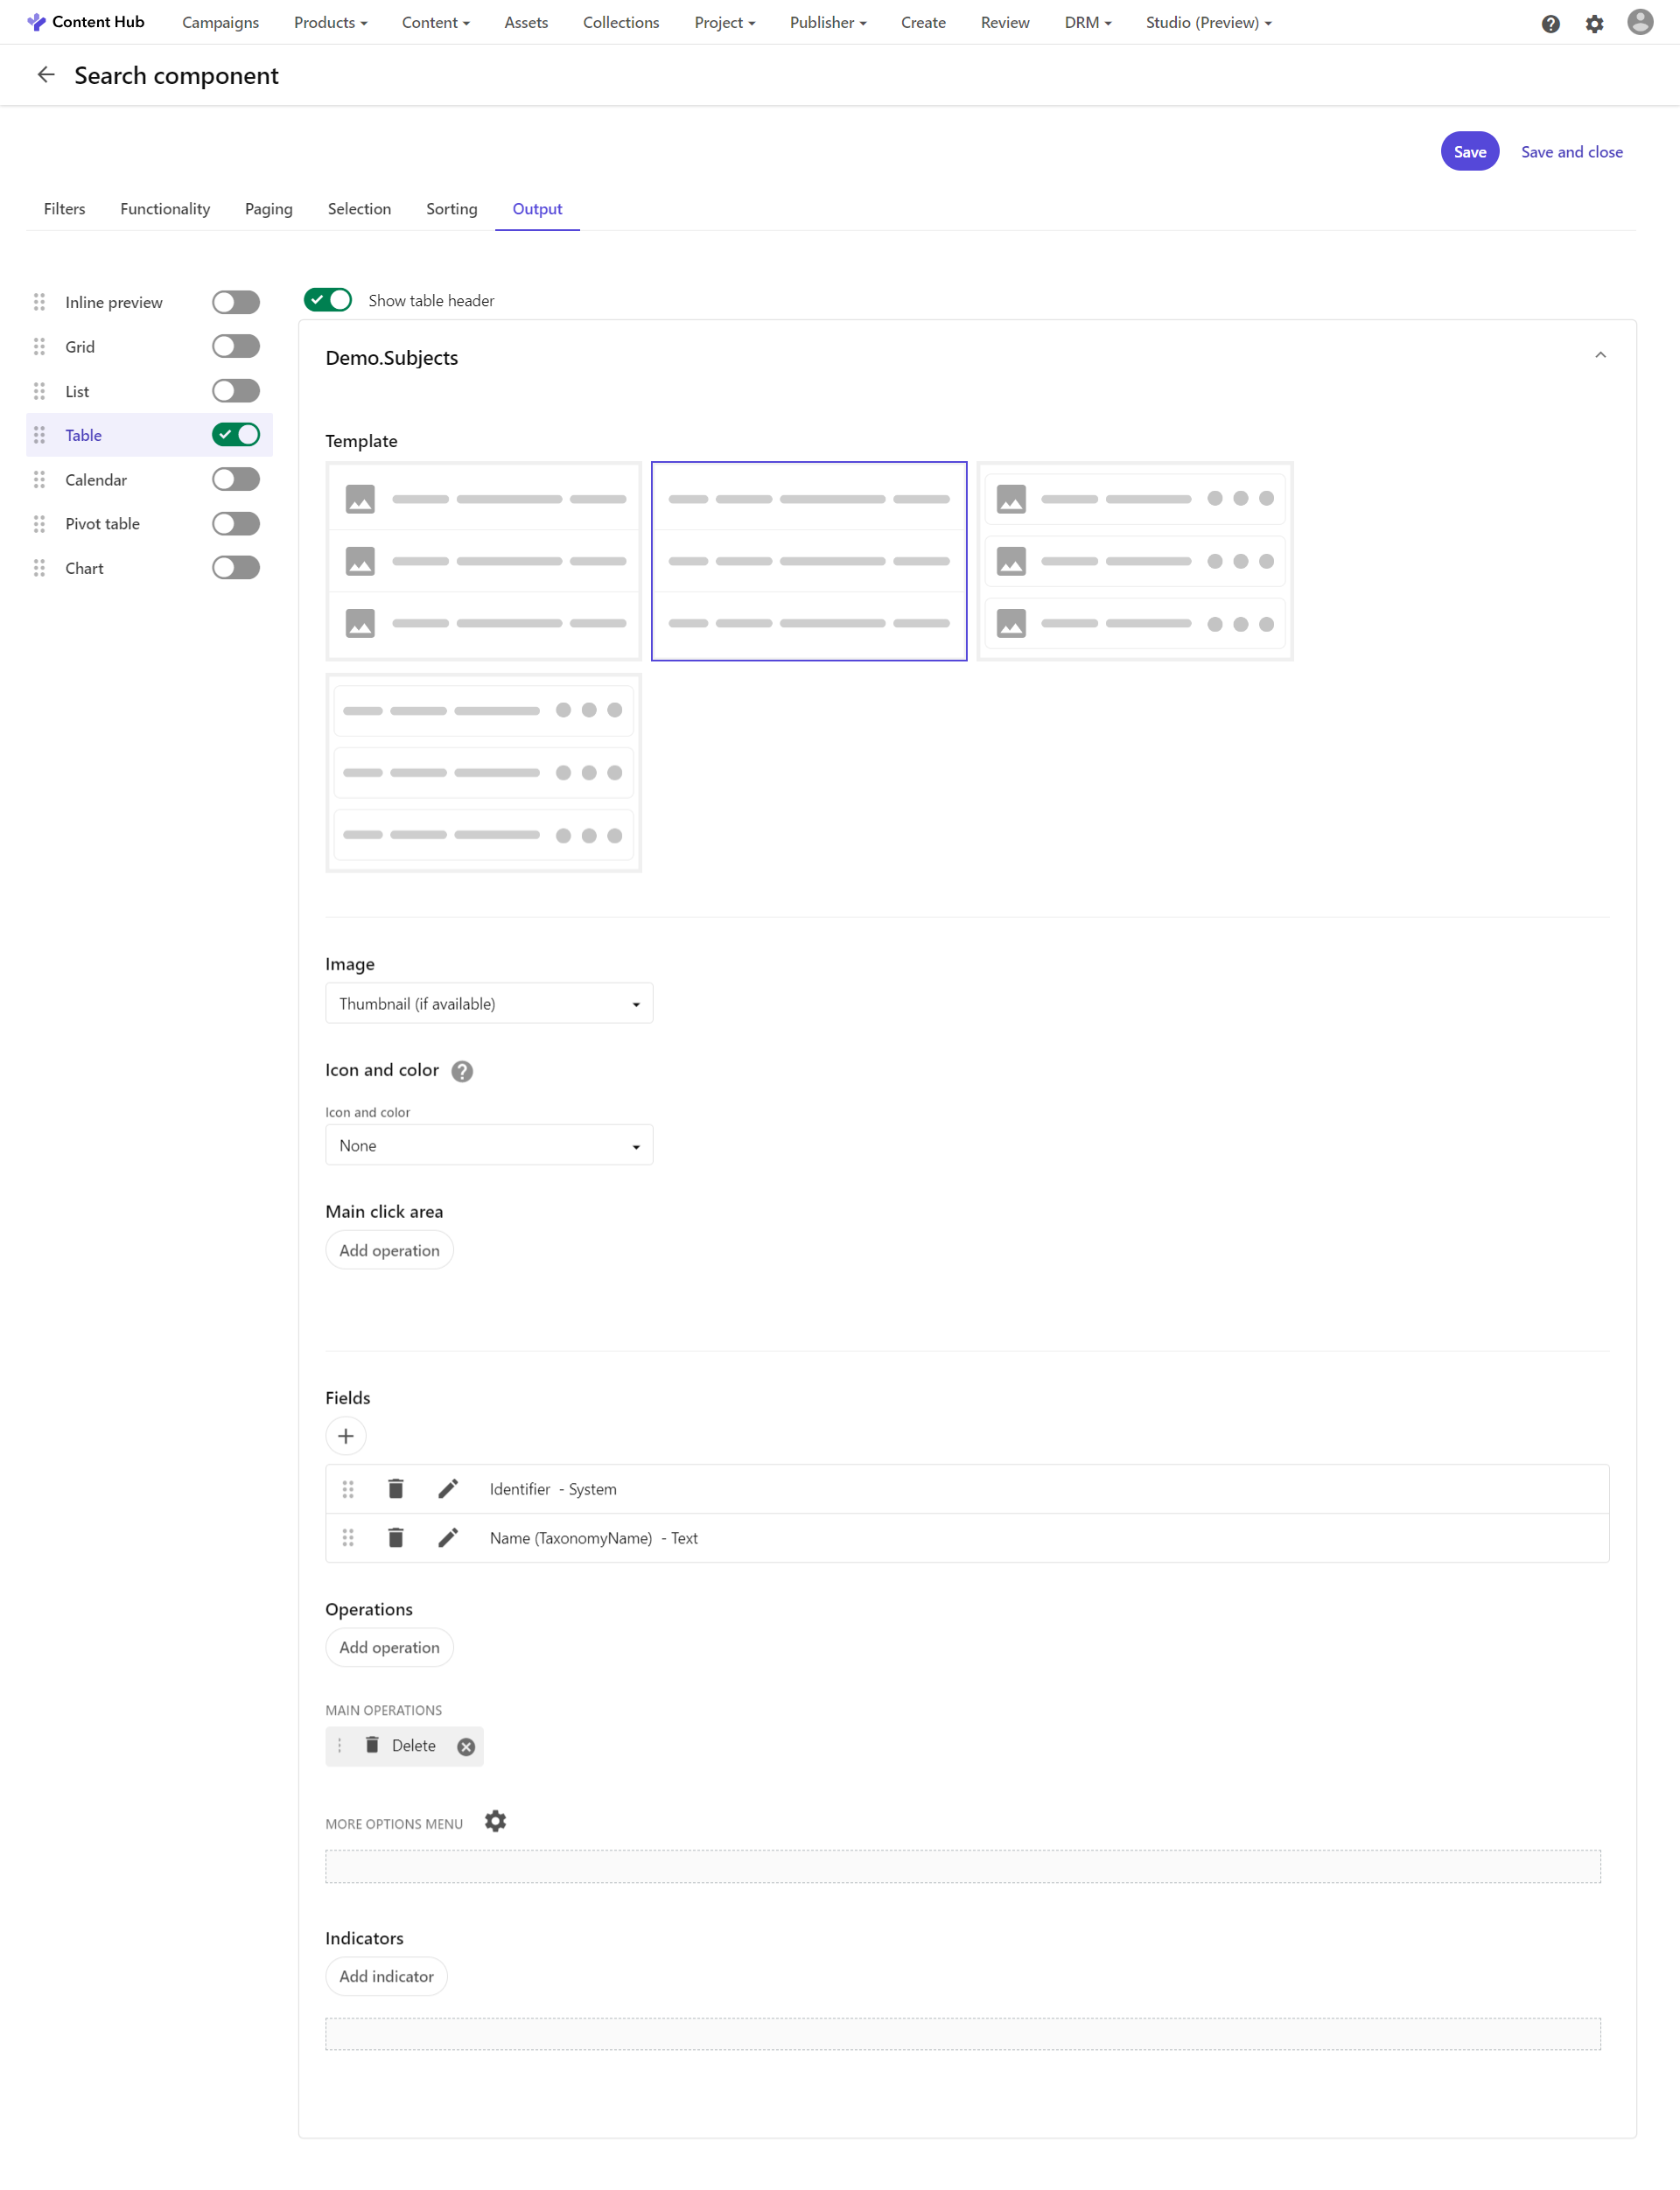
Now go to the Output configuration of your results, I personally prefer the TableNoImage view since it’s more concise for values that don’t have a thumbnail preview, and I like to expose the Identifier and TaxonomyName properties for easily identifying the values in the table. From here you can also enable the Delete operation or other actions. Once done, click Save and Close to go back to the Page layout configuration screen:
4. Creating the Selection component: Next we need to create the Selection component where we will configure our bulk actions.
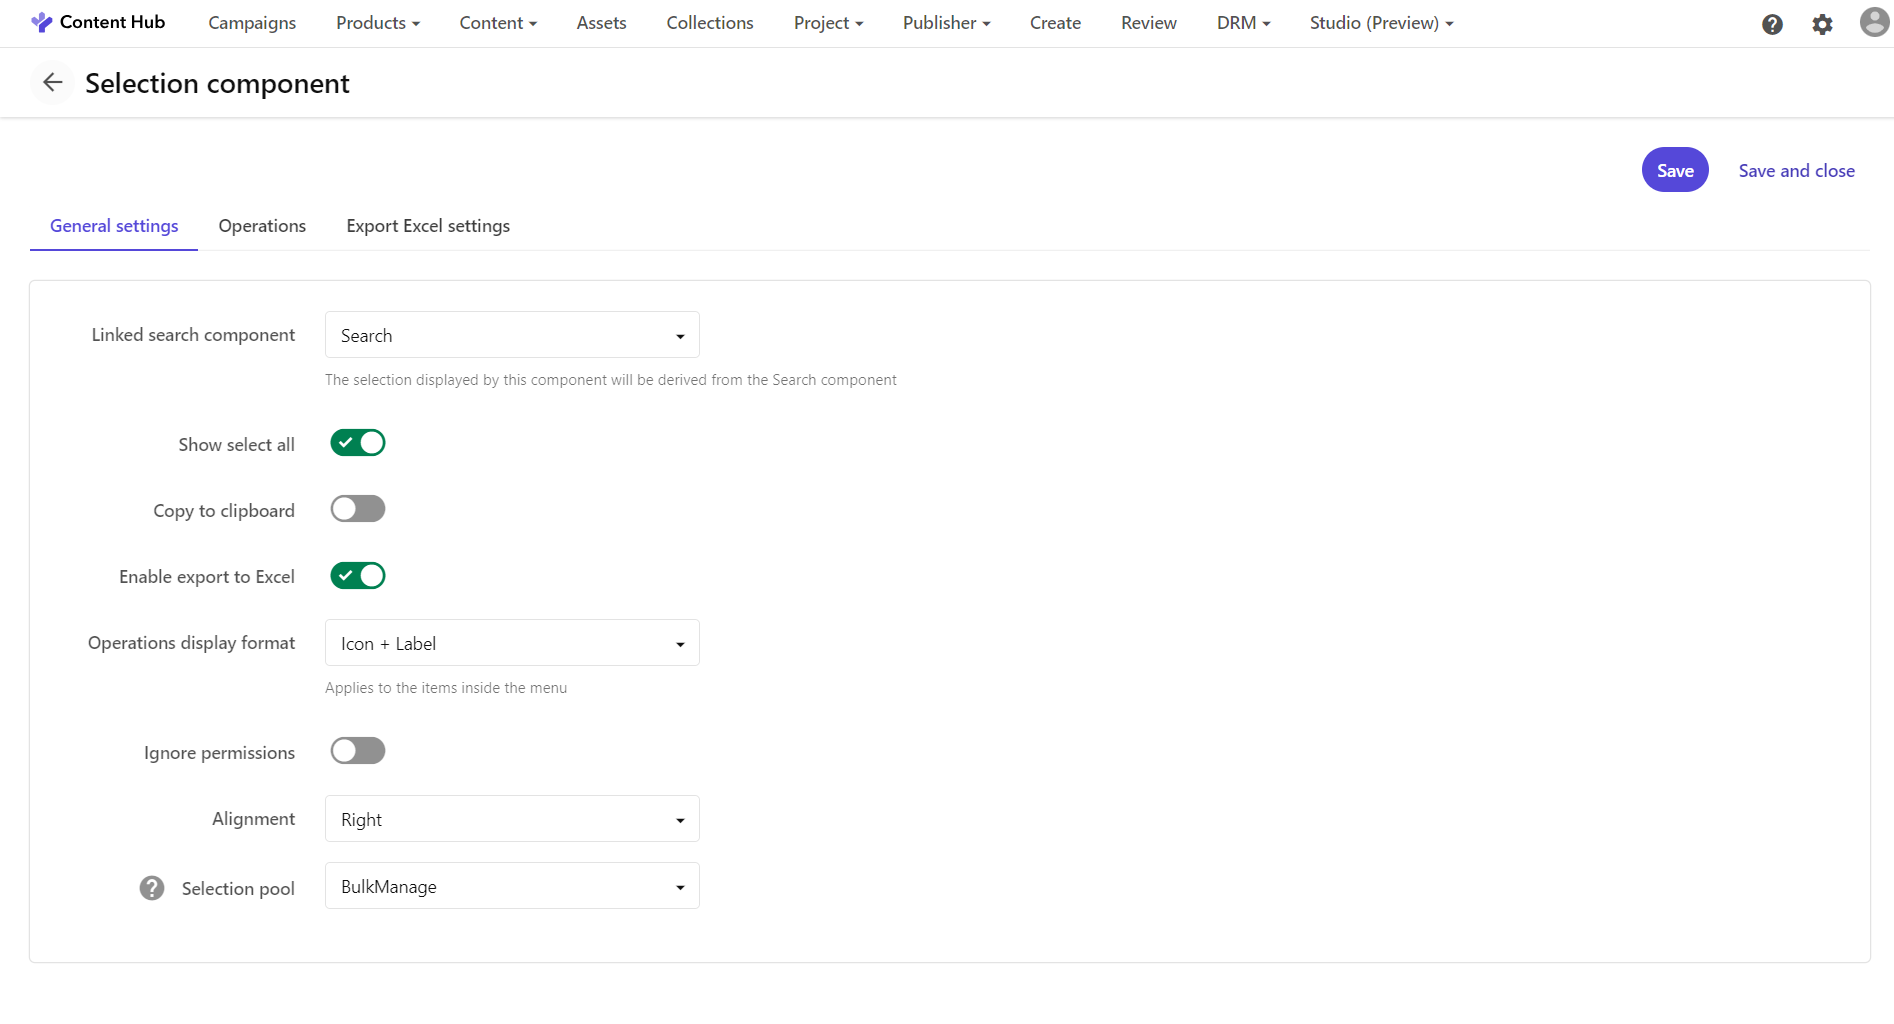
Within the Selection component, make sure to select Enable export to Excel, turn off Copy to clipboard and check that you have the correct Selection pool BulkManage linked to your component (it should be automatic):
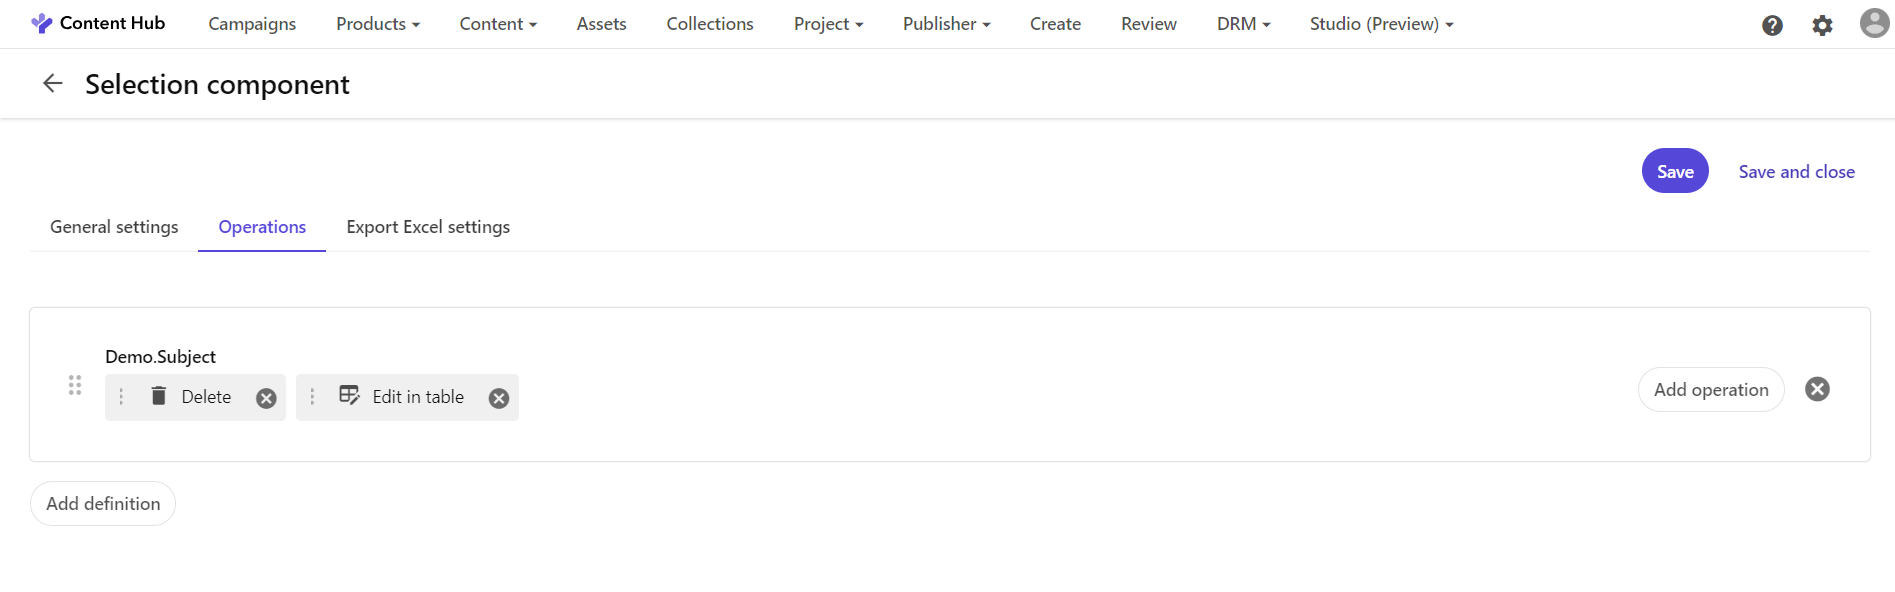
Within the Operations options, you can add Delete and other operations like Mass edit in Table (you must first create that page):
Within the Export options, you can specify a custom Export profile that you might have configured for your Taxonomy, but you can also leave it empty (which will just export all attributes by default).
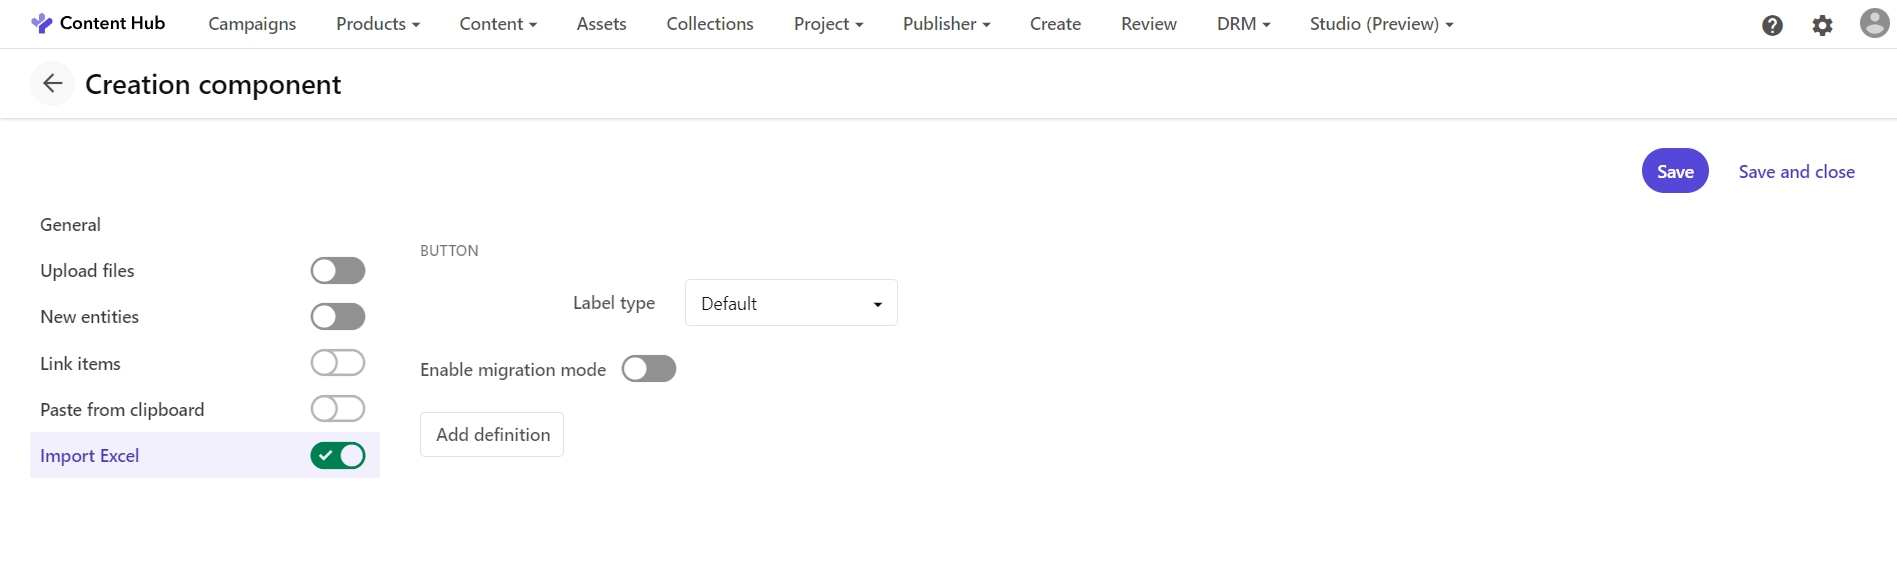
5. Creating the Creation component: The selection component now gives you the option to Export the taxonomy values in Excel, mass edit in table or delete values in bulk. But you might want to be able to reimport edits to the taxonomy values from your Excel worksheet back into Content Hub.
Create a Creation component and activate the Import Excel option:
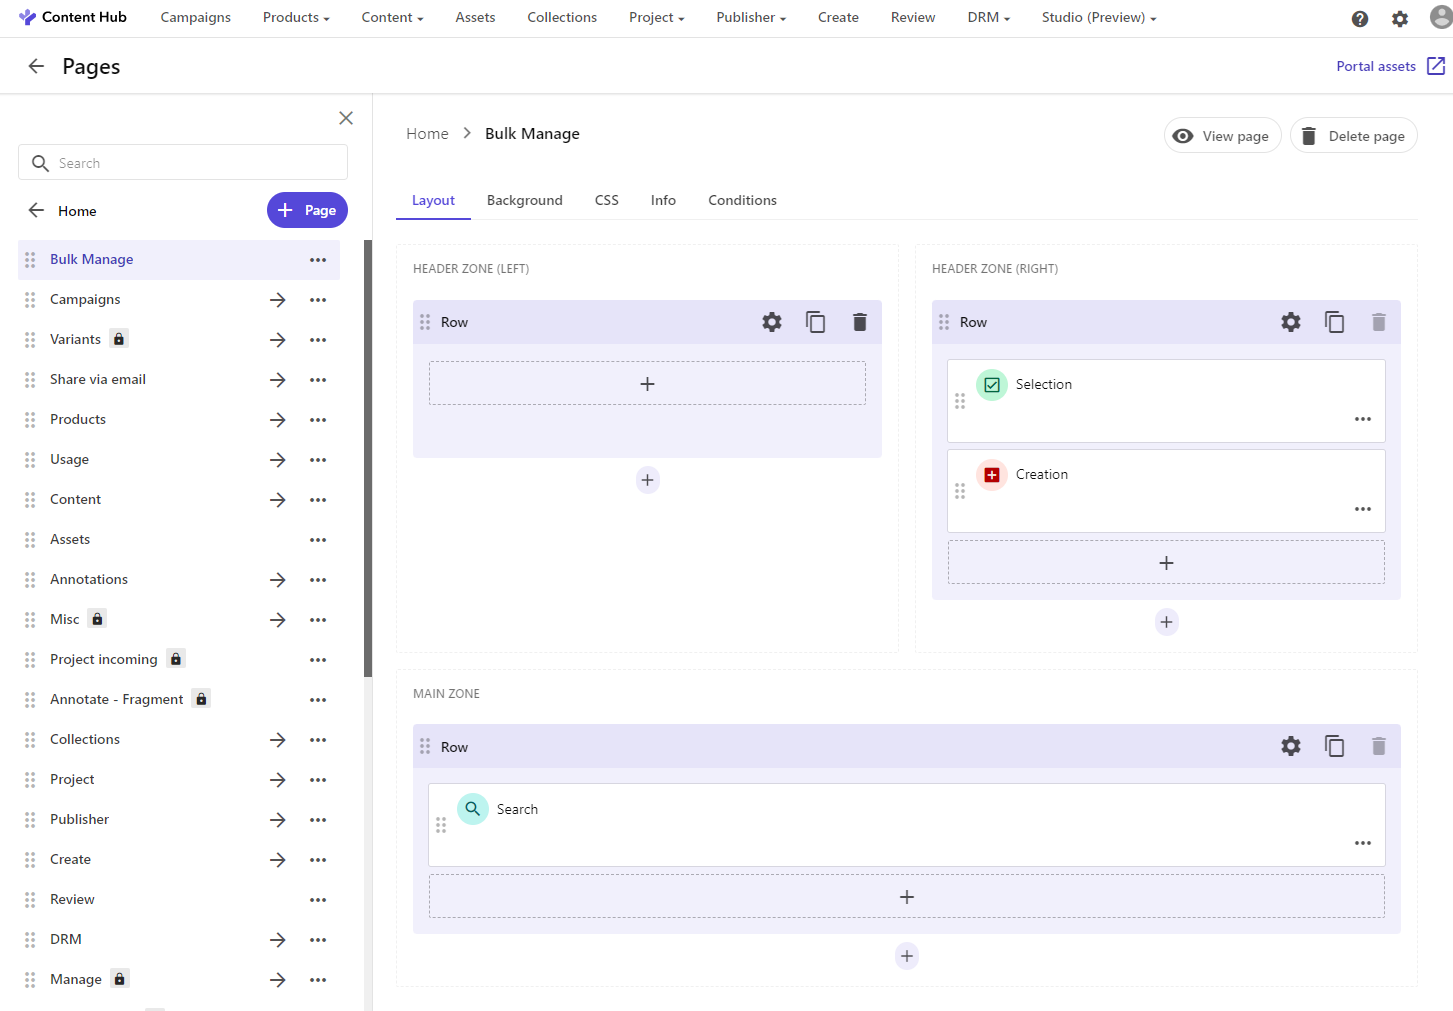
The Page Layout of your Bulk Manage page should now look like this:
Validating The Solution
1. Select taxonomies in bulk and Export: You can now (and should) finally validate the solution.
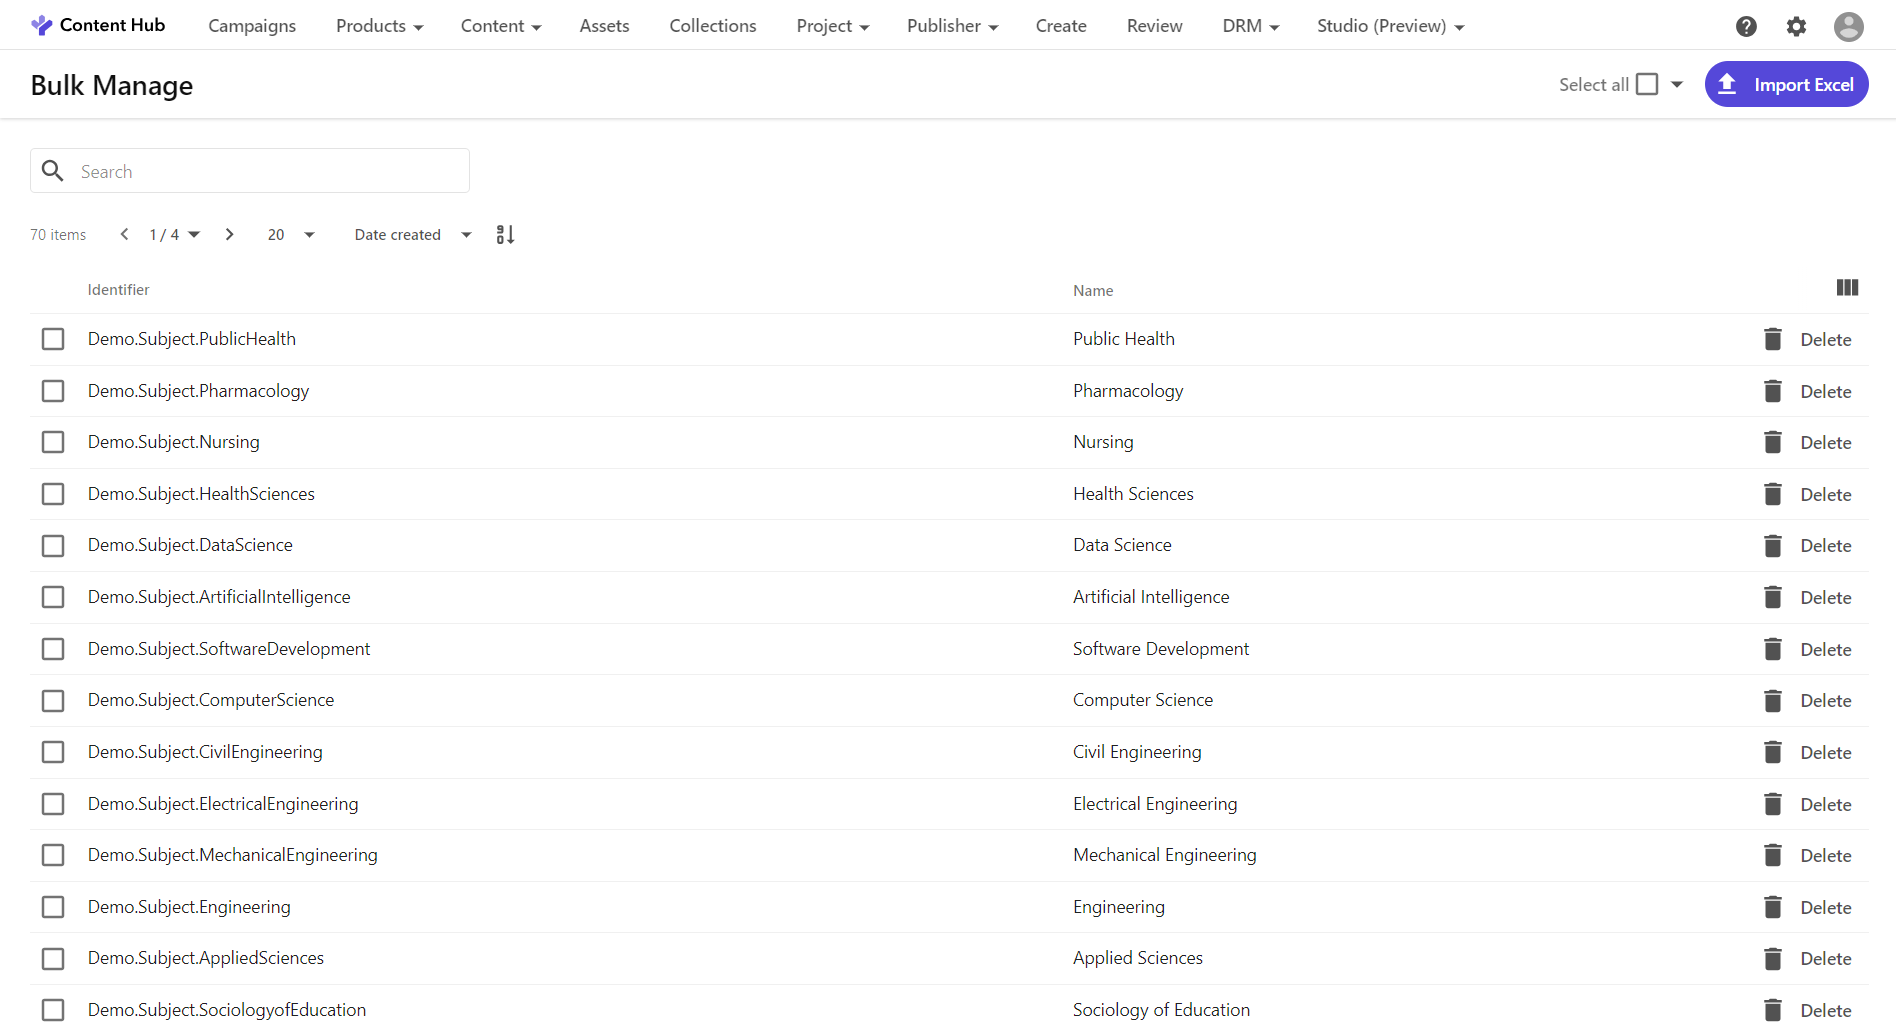
Navigate to the hidden page by clicking on View page.
Select in bulk your taxonomy values, delete in bulk or export in Excel:
Make edits in the Excel to your taxonomy values (be careful not to modify the identifiers as those are fixed unique keys for each value that already exists – if the identifier is not matched it will create a new taxonomy value) and import the edits back into Content Hub via the Import Excel operation.
Enabling Multiple Taxonomy Definitions
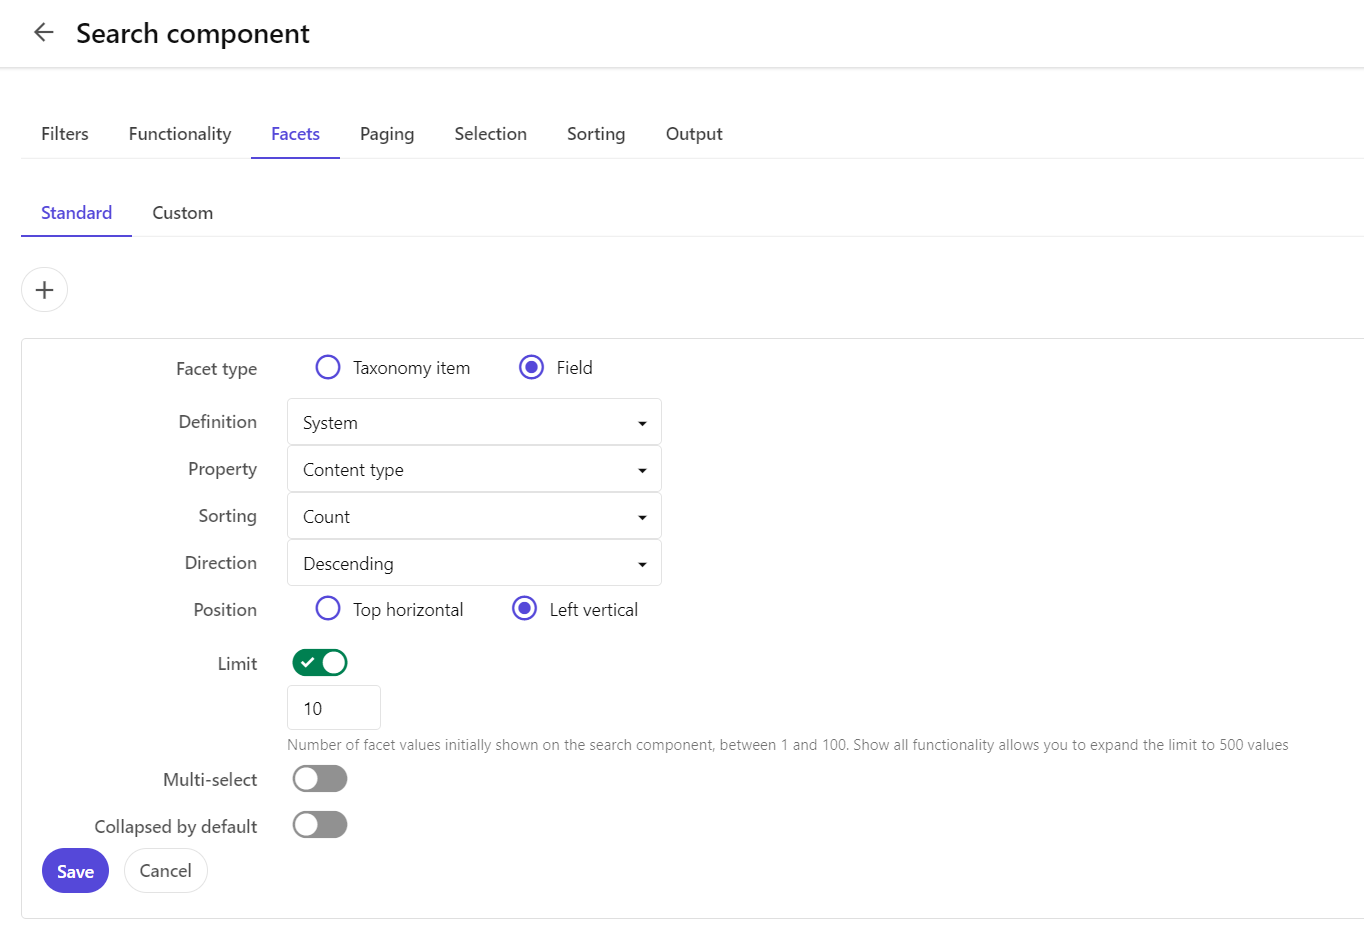
I have found this solution to be extremely helpful in my past implementations for managing taxonomies in Content Hub. I have also worked with multiple taxonomy definitions in the same page by duplicating this process within the same components and although technically possible, I wouldn’t recommend activating this for more than 5-6 taxonomy definitions in the same Search and Selection components since the number of definitions and operations become too large in the list. If you do choose to add multiple taxonomy definitions make sure to activate the System Content type facet for easily filtering the search results:
Caution and Best Practices
While these solutions can significantly improve the efficiency of taxonomy management, it is crucial to remain vigilant about the structure of taxonomy data. The Search component in Content Hub will display taxonomies as a flat list, which can be misleading if not navigated correctly. Always manage and review taxonomy hierarchies within the dedicated Manage / Taxonomy admin page to understand the full context and relationships between taxonomy values. Navigating and creating nested taxonomies within the hierarchy is best to be done either through a properly structured excel import file or manually from within the Taxonomy admin page.
Conclusion
In fact, I had to use my own Bulk Manage page to mass delete and reupload some corrections to my taxonomy values while writing this article. I strongly encourage you to implement this feature in your project and see the benefits for yourself. Have you found other effective methods for managing taxonomies in Sitecore Content Hub? Happy to discuss further or connect directly to exchange more insights and tips!